Tuesday, November 29, 2011

Started my fabric tag Advent Calendar

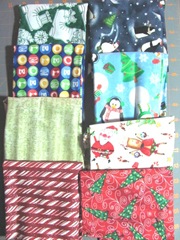
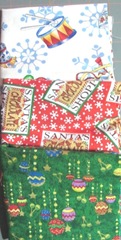
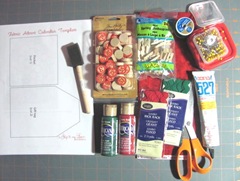
2011 advent fabric calendar supplies my supplies
      I went thru some of my fabric bins to see what I had on hand to use for the Fabric Advent Calendar that I wrote about the other day. While I was out yesterday, I stopped at Joann Fabric's to see what they had for fabric. I found Christmas fabric on sale for 50% off, and so I bought several 1/8th yard pieces. At A. C. Moore I found a few fat quarters with Christmas prints.
I had the paint and rick rack on hand, as well as the Tim Holtz wooden numbered pieces that I bought some time back with a 50% off coupon. Don't you just love coupons?
Below: my print fabrics
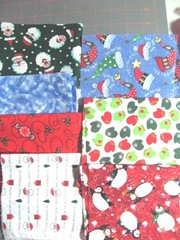
2011 advent fabric calendar fabrics32011 advent fabric calendar fabrics2
2011 advent fabric calendar fabrics1
I ironed the fabrics, cut out a few pieces, and then stitched two tags. The sewing went together fast, and then I stitched around the outside of both tags.
The start of my fabric Advent Calendar: using 2 fabrics so the little front pocket is contrasting.
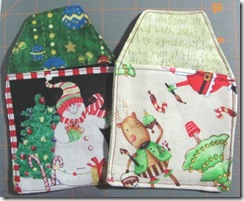
2011 advent fabric calendar
I will post more pictures as I go along. I need to paint my clothes pins and add the numbered wooden buttons. I found the clothes pins at Joann's. Michael's only had the tiny spring wooden clothes pins and they wouldn't have been strong enough to hold a tag with a gift inside. I noticed that the clothes pins that were used came painted red. Not sure if I will have time to get my clothes pins painted. I may just go with the natural color for now.
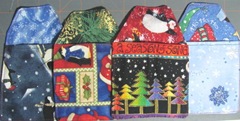
 
Later this afternoon...4 more tags. They need to be ironed.2011 advent fabric calendar2
Back to sewing. :-)
elaine signature3

Sunday, November 27, 2011

Quahog Chowder

I had a busy long holiday weekend. Thanksgiving Day was spent with family, 12 hours of non stop shopping on Black Friday, and then another day of Christmas shopping yesterday (Saturday). Today, I relaxed, did some laundry, straightened up a bit, and started going thru what I bought for presents, and then sat and created some gift tags.
When I finished making my wine bottle tags earlier today, I got busy shucking a bag of about 20 cherrystones/quahogs that my son, Steven gave me on Thanksgiving. So, tonight's supper will be homemade quahog chowder. I will share my recipe with you.
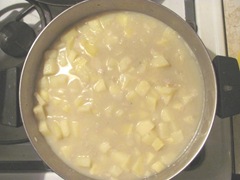
quahog chowder cooking in the pot potatoes, onions, quahogs and juice cooking in the pot.

I had a piece of salt pork in the freezer, and I cut a small slab off the frozen piece. I diced the salt pork really fine, and put it to brown in my 6 quart kettle. I then added my diced onions and sautéed them till they were translucent. I then added diced potatoes (5 pounds, peeled and diced). Add only all of the quahog juice and then add clam juice until the potatoes were just covered over. I never use water in my chowders and I don't thicken up my chowder with flour. If you like thicker chowder, let your potatoes cook down more, or you can add instant or mashed potatoes.  The chowder will thicken as it sits. Just before the potatoes are fork tender I will add my chopped quahogs ( I use my food proccesor to chop my quahog). Cook the quahogs until they are tender.  Quahog chowder is a little stronger with a more briny taste than the blander clam chowder.
Final step...add 1/2 & 1/2 cream to the pan, and a little milk. ( how much you use depends on how thick you like your chowder. I usually use about 1/2 a container of cream) If you like you can add a pat of butter. Yummy!!
Do you make chowder, if so how do you make yours?
Just like a lot of soups and stews, chowder always taste better the next day, but who can wait.

If you don't know what quahogs are, then read about quahogs on the following sites...Quahogs , more on quahogs
My son and his friend have shell fish permits, and they go digging for clams and quahogs.So, the shell fish they get are always very fresh and tasty.
elaine signature3

Wine Bottle Gift Tags

wine bottle with tag

I made the wine bottle tags about a week ago, but am just now getting the photos uploaded.  I have a few people on my Christmas list that like wine, and so I decided I would make my own gift tags for the bottles of wine that we will be giving as gifts.

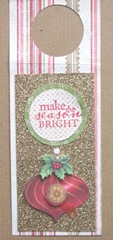
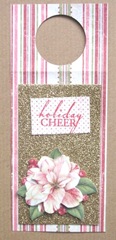
To make the wine bottle tag I chose striped card stock that I cut to  2  1/2  wide - 5  3/4  long.  With a  1 - 1/4  inch round punch I cut a circle to into the strip for the opening.  The opening is 1/4 inch down from the top of the cardstock.  A little under the circle opening I scored and creased a line.  Then I cut a piece of heavy, gold, glittered card stock. I rubber stamped my greeting onto a cut out 1- 1/4 inch circle and attached that to another punched out card stock circle that was 1- 1/2 inches.  I then added an embellishment from K & C Company that I bought in a package from Michael's. I am happy with how my gift tags came out. The wine tags were photographed on a piece of brown Kraft paper card stock so the tags would show up better. The heavy, gold glittered card stock doesn't photograph well, but it is very glittery and pretty.

wine tag ornament 2  wine tag Christmas rose1

If you have any wine lovers that you will be gifting with a bottle of wine, why not make your own tags. You could even personalize the tag with a punched out photo. Using a circle punch, select a photo and add that to the tag of the person you will be giving the bottle of wine to . 

elaine signature3

Advent fabric tag calendar

fabric advent gift tag calendar photo from Skip to my Lou blog.

This morning I found a blog...Skip to my Lou and found this wonderful Fabric tags advent calendar tutorial . I probably won't have time to get one done for this December, but I want to work on a couple for next year to give to the grandkids. If you sew, check out the blog. The tutorial is great and there is a pattern for the tags.

If you sew, what have you created for the holidays to give as gifts or to use in your own home?  Do you have any quick and easy projects to share?

Yesterday, I again hit the stores from 8-4. I am mostly done with my holiday shopping, but I still need to finish getting stocking stuffers and a few little odds and ends. Then...the big job of wrapping and keeping the kitties away from the gifts and ribbons. We shall see how that goes.

Have you started your shopping yet or do you shop on the internet to beat the crowds?

elaine signature3

Friday, November 25, 2011

12 Days Christmas Swap

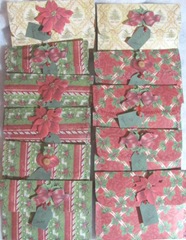
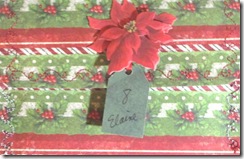
12 days 2011 all gift envelope3 my 11 handmade card stock gift envelope pouches with decorative stitching to hold my handmade gift.

12 days 2011 gift envelope1 close up

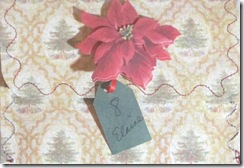
12 days 2011 gift envelope2 close up

I signed up again this year in the yahoo art group, An Affair with Art for the annual 12 days of Christmas swap. The due date to mail out our small gifts is today and I in between shopping I stopped at the post office to mail them out.

I can't share with you what I made as my gift yet, or it will spoil the surprise for any in my group that reads my blog.  I was assigned the 8th day and I will post photos after that. I created and changed my mind several times before settling on the gifts that I am mailing out.  Talk about indecision or can't make up one's mind. Yikes!

There were enough sign ups to make up 3 groups of 12 for this popular swap, and I am in group 3. I will receive packages from 11 gals in my assigned group, and we start opening our daily gifts on December 13th.  I created my own card stock gift pouch/packages, and while I had the sewing machine out  I used a decorative stitches on the little pouches. For a closure, I used round Velcro pieces. Then I  added a decorative embellishment to the pouches and little day 8 tags.

Black Friday...shopping adventures...my girlfriend, Betty Ann called me before 4 a.m. to see if I was up. Betty Ann got to my house around 4:15 and we were off.  We headed to Wareham to Walmart for our first stop, and we both got a 40 inch TV for $248.

We did quite a bit of shopping, and then headed to J.C. Penney, Michaels, and Target. Stopped to get a coffee and then headed to my house to drop off my stuff, and then to her house to unload.

Next, we headed to Raynham/Taunton...hit several stores, and then went to Bridgewater and our last stop was to Halifax. 12 hours later I am home and exhausted, as I didn't sleep well last night.  Now, to have a quick bite to eat, and I'm heading to bed to watch TV, and I am sure I will be watching TV thru my closed eyelids. :-)

If you hit the stores today I hope you found as many bargains as we did.

elaine signature3

Thursday, November 24, 2011

Gingerbread man pin

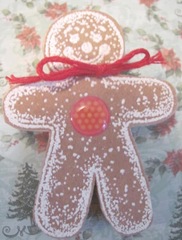
gingerbread man pin

The base of this little gingerbread man pin is made of balsa wood. I rubber stamped the PSX gingerbread man onto brown/kraft sticker paper using white embossing powder and my heat gun.  I decided on white embossing because I wanted the gingerbread man to look like it had iced frosting. The red polka dotted circle is a glossy raised sticker. I used embroidery thread for the tie around the neck.

I cut out around the gingerbread man and then applied the sticker paper to a piece of balsa wood. I cut the balsa wood around the image with an exact-o knife and then sanded the edges with a white foam sanding block that you can buy at a beauty supply store. Then I tied the bow and added a pin backing. The pin is 2  1/2 inches long.

Happy Thanksgiving Day to all. 

elaine signature3

Wednesday, November 23, 2011

Snowman button ornaments and Strawberry Dessert Recipe to share

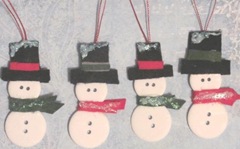
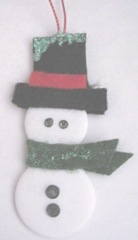
button snowman ornaments 2011
This morning while I was waiting for my Strawberry Dessert to thicken up to the gel stage, I sat and made some little button snowman ornaments. I will add these to some of  my wrapped Christmas packages.
I bought the white buttons that I used at Michael's. Unfortunately, each package only had 2 of the large ( 1- 3/4 inch ) and 2 medium sized (1 inch) buttons, and several dime sized buttons. I could only make 2 snowman from each package of buttons. The finished size of the snowmen are 3- 1/2 inches long. To make these little ornaments, I used craft glue, felt, thin cording for hanging and glitter glue. 
Update..November 27..I found some sticky backed black rhinestone embellishments under some papers on my desk and decided to add them to one of my button snowman ornaments.
button snowman ornament 2011 with rhinestones

My youngest son, Steven loves Strawberry Dessert, and he requested that I bring this for one of the desserts tomorrow.
...Strawberry Dessert Recipe...
Use 2 small packages or 1 large package of strawberry Jello/gelatin
3 cups boiling water
1 teaspoon lemon juice
1 small container (1 pound) thawed frozen sliced strawberries
1 (10.5 ounce) angel food cake bar
I usually slice the cake into 1/3's lengthwise and then cut into bite size pieces.
I always scrape away the brown top and sides before cutting into bite size pieces. There are less crumbs by doing this.


Cut the cake into bite size chunks. 


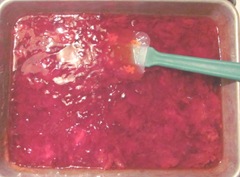
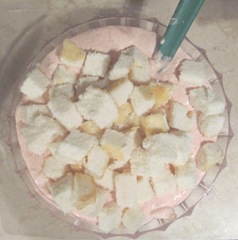
Mix the jello, hot water and lemon juice until it's blended well. Then add the container of thawed frozen sliced strawberry's to the Jello. If the strawberry pieces are big, cut them up. Pour into a large metal pan (so the mixture gels faster), place pan in the refrigerator until the Jello just starts to set/gel. strawberry dessert gelled jello ready to add the Cool Whip
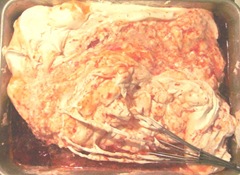
strawberry dessert mixed in cool whip1mixing in the Cool Whip  or whipped cream into the jello mixture
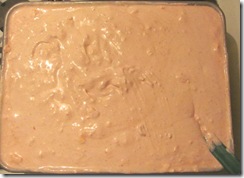
strawberry dessert mixed in cool whipall mixed in
Note: (If you didn't check on your jello soon enough and your Jello got a little firmer than the just starting to gel stage, don't panic,  mix the jello with a wire whip and let sit out for a bit until it softens up some.) With a spatula or wire whip stir the jello/strawberry mix, fold in a large container of Cool Whip or whipped cream until the mixture is a pretty pink and there are no large pieces of gelatin and Cool Whip showing.
Then fold in your chunks of angel food cake.
strawberry dessert mixing in the angel food cake  
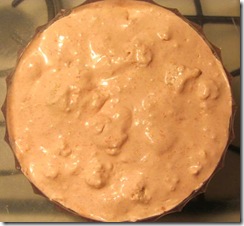
strawberry dessert top view2

top view of dessert in bowl
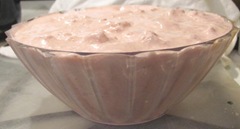
strawberry dessert finished in bowl   
Place the mixture in a pretty clear bowl, chill until ready to serve. This makes one large bowl, or will fill two smaller bowls. Today, I use two smaller bowls from the Dollar Tree store. I can have a bowl to keep at home, and one to bring to the dinner. When you have a chance try making this dessert, I think your family will like it. I gave this recipe to one of my mother's care givers last week after she asked me if I had a pretty and fairly easy recipe to share with her for the holidays. She made this, and her family liked it.
Sorry that the photos aren't the best.

***Note***
You can use sugar free Jello if you want and there is no difference in taste. Also, instead of Cool Whip, you can whip a pint of whipping cream with a 1/4 cup of sugar, beat until the whipped cream is stiff. Then fold the whipped cream into the Jello mixture, fold in the chunks of angel food cake.  I mix the jello and Cool Whip in the pan. Any questions...just email me.
Happy Thanksgiving to all. I hope you have a wonderful day with family and friends. Then on Friday, if you are brave, off to shop the Black Friday sales. Have fun!!!
elaine signature3

Monday, November 21, 2011

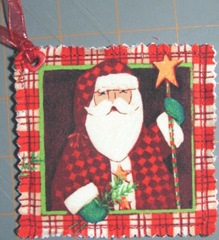
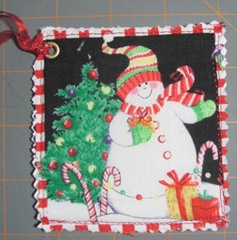
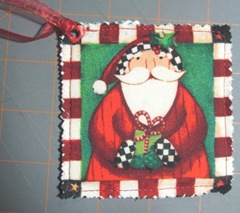
Fabric..Snowman and Santa gift tags

2011 Christmas fabric gift tag snowman1
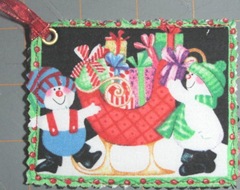
2011 Christmas fabric gift tag santa 2  On the yahoo group, An Affair with Art that I belong to, I signed up for a Christmas gift tag swap, but only after I completed my tags. We will be assigned 2 partners and I will be sending two tags to each swapper. The swap hasn't closed yet, so I don't know who I will be sending to.
My sewing machine was out, and I had holiday fabric so I decided to make fabric gift tags for the swap. For each tag I cut out with pinking shears a printed piece of fabric, for the middle a piece of stiff interfacing, and then a piece of white fabric for the backing. I stitched the tags, and with a thin point permanent marker wrote To and From on the back sides.  I then punched a hole with my crop o dile and placed a grommet with ribbon to hang the tag. I will send a snowman and a Santa to each swapper.
2011 Christmas fabric gift tag snowman2
  2011 Christmas fabric gift tag santa 1
The rules of the swap didn't specify the tags had to be made from paper.
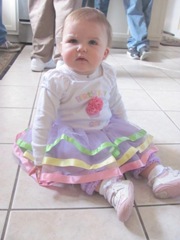
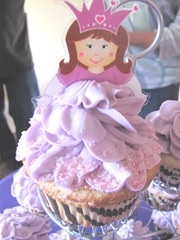
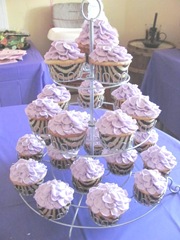
Saturday, we went to my great niece Cassie's first birthday party. So, here are a couple of pictures of the birthday girl.
Cassie first birthday party sitting on floor all decked out for her party Cassie first birthday 1   loving the frosting
Cassie first birthday closeup cupcakeclose up of  Cassie's cupcake
Cassie first birthday cupcake treepretty cupcakes
elaine signature3

Thursday, November 17, 2011

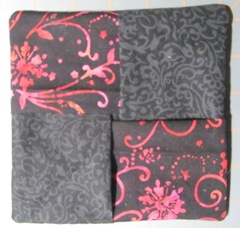
Potholder

potholder2
I saw a video on YouTube the other day, but I couldn't hear the woman giving the directions to make this potholder, because my speakers weren't working for some reason.  I did the best I could from just watching the video.
Trial and error...first mistake I needed a bigger quilt acrylic square to cut my fabric. I only had a 6 x6 inch square, and it turned out way to small for a pot holder that I would use. Since this first pot holder was a trial and error piece I'm not disappointed. I won't use this first pot holder for the oven, but I can still place it on the table and place a hot dish or pan on it.
You can view the video here that I watched and tried ....simple potholder in minutes
I have to admit it took me many minutes, because I didn't have any fabric cut and ironed and ready to assemble. I used fabric pieces that I had on hand, and I also used a thin quilt batting in between the layers for added thickness.
Next time I am out I will pick up a bigger acrylic quilt block template to cut my fabric pieces. I still need to listen to the video.
elaine signature3

Tuesday, November 15, 2011

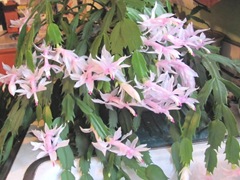
Thanksgiving Cactus

Christmas cactus1 2011

I took this picture this morning at my aunts house. Auntie's Thanksgiving cactus is huge. This photo is of just one side of the plant. Isn't my aunt's Thanksgiving cactus just beautiful?

I don't have much luck with cactus, because my cats think the dangling stems are for their amusement. I find stem pieces knocked off all the time here at home. When I am trying to root broken off stem pieces in water, the cats pull the stems out of the water, and I find the stems filled with puncture holes on the floor all mangled and dried out. Urgh!!! So, I have given up and just enjoy my aunts cactus. I've also given up on Spider plants as they don't fair any better than the cactus with the cats.

Thanksgiving cactus 11.2011 close up of the flowers

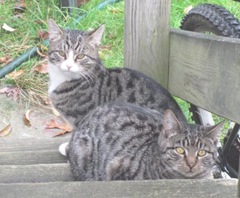
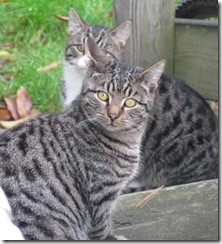
Here is a picture of the 2 stray kitties sitting on my back steps this morning.

Stray kitties 11.2011 on porch steps 

stray kitties 11.2011 on back porch steps.

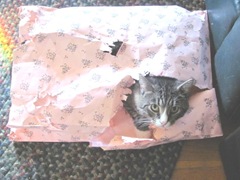
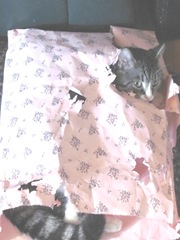
Below: Tuffy in his favorite hiding place or at least he thinks he is hiding. Fluff Puff tears up the bags and Tuffy loves sleeping in them.

Tuffy kitty in a pink bag 11.2011

Tuffy kitty in a pink bag 11

I ran a few errands this morning, and I stopped at Joann Fabrics to see what I could use my 50% coupon on. I bought a huge cutting mat. Great deal instead of $70 I got it for $35. I just unrolled it and put it in back of my sewing cabinet to straighten out, as it had been rolled up.  I had a smaller cutting mat, but it wasn't long enough to work with bigger pieces of material. I can't wait for the plastic to straighten out so I can use it.

Yesterday and this morning we enjoyed gorgeous, warm and sunny weather, but the clouds have settled in this afternoon, and I've noticed a few sprinkles at times. We are expecting rain for later today and tomorrow, and then the weather is suppose to get colder. It has been wonderful lately with the warm weather as the heat hasn't come on at night. Wish we could have that kind of weather all winter long.

elaine signature3